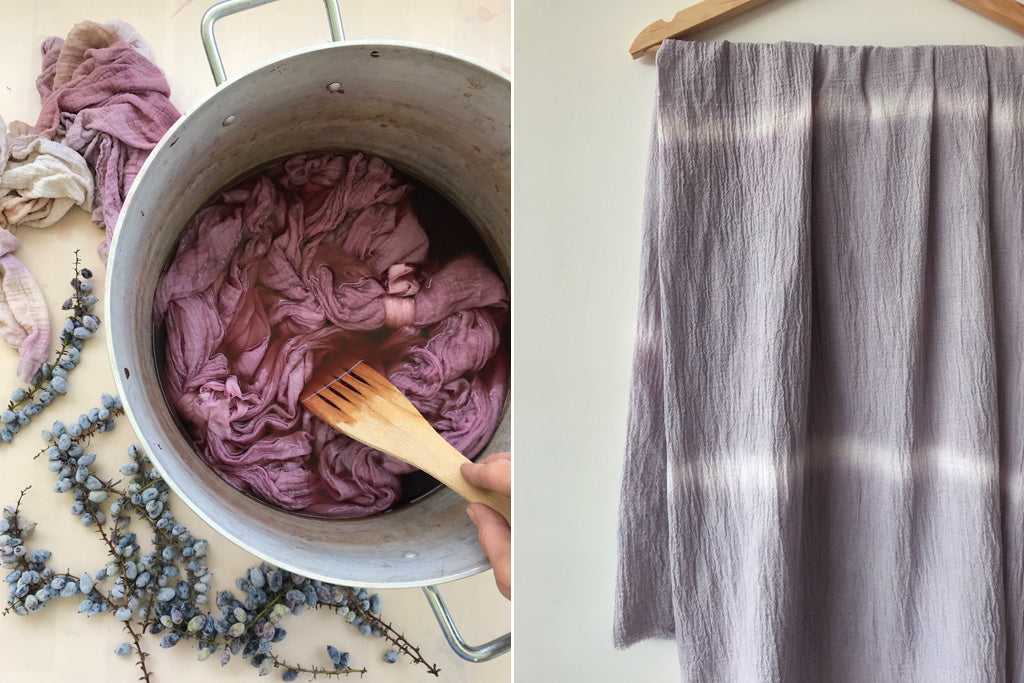
In this blog post I’ll show you how to dye a scarf with mahonia berries (also known as Oregon grape) with a simple tie dye stripe pattern. These are my local berries – in the early summer, the bushes are laden with hundreds of strands of these little purple jewels. Maybe you have other local berries growing abundantly. You can follow this recipe and use the berries of your choice. Berries are pH sensitive, so I’ll show you how you can adjust the colours and make multiple shades.
Botanical Colour at your Fingertips
If you’ve read my natural dye book ‘Botanical Colour at your Fingertips’, you may have spotted mahonia berries within the pages. Mahonia is one of my local plants – this colour is quite literally at my fingertips. In the book, I encourage you to try the plants that you have growing near you. Perhaps you don’t have mahonia bushes, but some other kind of berry growing in abundance. Providing you can identify it correctly and it’s not toxic, then try it in your dye pot and test the colour!

Making your own scarf
My favourite way to make scarves is to simply cut up fabric and leave the edges raw. In fact I like to cut a small notch and then tear the fabric along the grain. This method makes soft and floaty scarves that are so comfortable to wear.
I’ve been dyeing Greenfibres fabric for years, and recently I asked them if they could offer me a discount code to share with you, and they did! You can get 10% off your Greenfibres fabric (in fact any items in the Fabrics and Materials) category using the coupon code: DESNOS10.
I earn a small % fee for each order made but only recommend fabric that I love using myself 🙂
The fabric I’ve used in this blog post is the Fine Loomstate Organic Cotton Muslin. It has a great texture for scarves.
How long does berry dye last?
The pigments that are responsible for the colours in berries are called anthocyanins. Depending on the pH, they may appear blue, pink, purple or even black. Generally all anthocyanins fade in sunlight, and some colours will fade faster than others.
Berries are generally considered to be more of a stain than a dye, so the colour is likely to eventually mellow to a brown. This may take a year or two, or it might happen sooner. It depends on how much light your fabric receives.
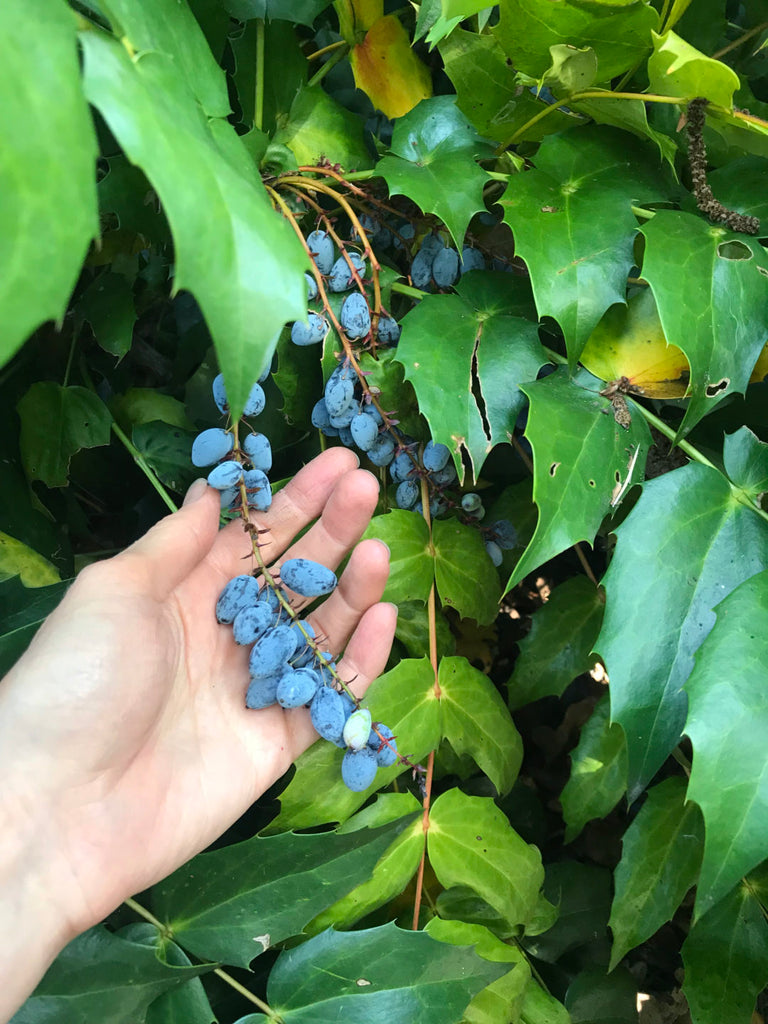
Despite the transient nature of berry dyes, it is still fun to dye with them. I’ve decided to dye myself a summer scarf with mahonia berries. I will enjoy wearing it all summer and see how long the colour lasts. Then I will just dye it again to top up the colour. If you take care of your scarf, you might be surprised how long the colour lasts.
Tools and Equipment
A note on safety: Use separate equipment from your usual kitchen equipment – you need a separate set that is reserved for dyeing. Keep good air flow when dyeing indoors. Keep your dye pots well away from food, children and pets.
- A large dye pot (I used aluminium)
- A potato masher (a separate one reserved just for dyeing, as with all of this equipment)
- Sieve + muslin cloth for straining
- Stirring spoon
- 100% natural fabric, such as cotton or linen (I’m using organic cotton)
- Sharp scissors to cut your fabric
- Strips of thick fabric to create “tie dye” stripes
- Mahonia berries (or other non toxic berries of your choice)
Let’s prep our fabric before dyeing
1. Prewash the fabric in the washing machine using a natural laundry liquid/soap.
2. Then pretreat with soya milk according to the usual method that I use in my book Botanical Colour at your Fingertips paperback and eBook. Or mordant using an alternative method, if you prefer. If you choose to use the milk method, you can try other types of milk too.
OK. First let’s create stripes on the fabric
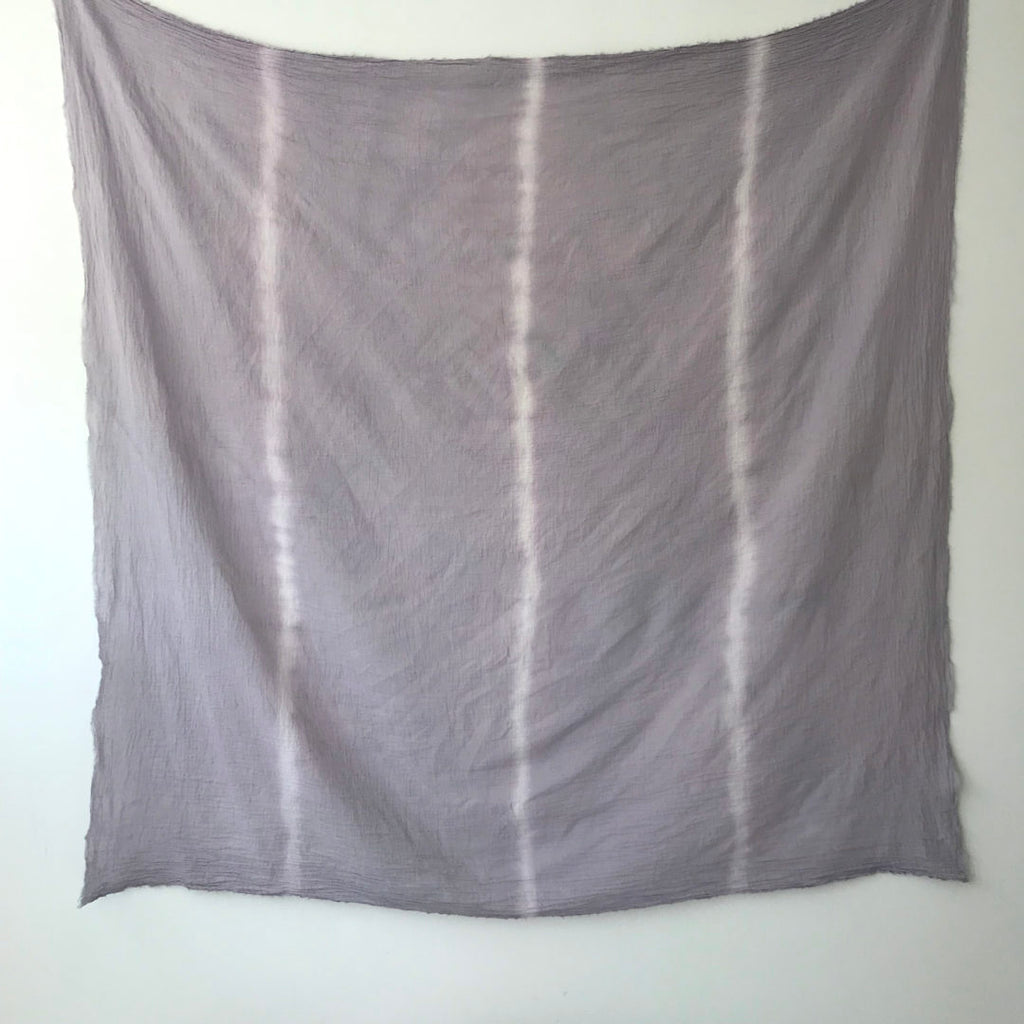
This method can be as simple as tying string around the fabric. Where the dye doesn’t reach the fabric, it will not dye. Over the years I’ve tweaked my method for making stripes, and I’ll share it with you today. This is what we are aiming for:
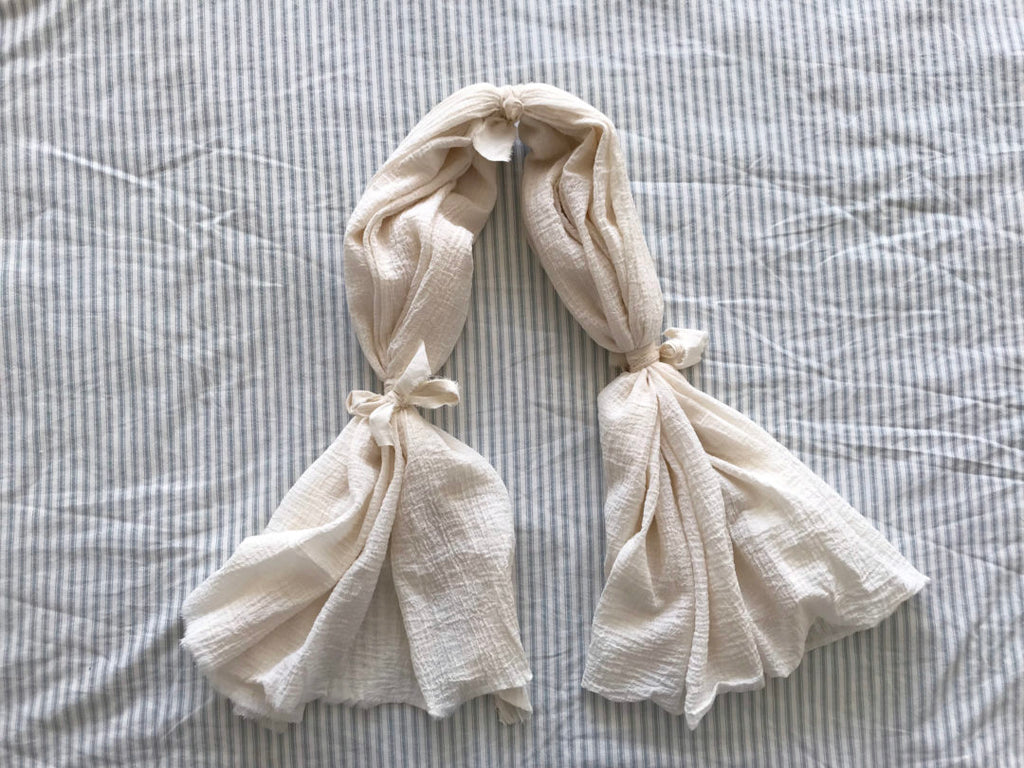
Rather than using string, I like to use strips of fabric as they make a wider band around the scarf and make wider stripes. I simply tear up old sheets or use some old cotton calico that I have.
1. Tear up some old fabric to make strips. Cut a notch in the side of your fabric that is about 1 inch from the edge, and tear the fabric with your hands. If it doesn’t begin tearing right away, try cutting a longer notch. Most fabric will tear along the grain. If you like, you can make the fabric strips wider to make wider stripes on your fabric.
2. Cut the strips so they are about 70cm in length.
3. I made 3 fabric strips as I’d like to make 3 stripes.
4. Lay your scarf down on flat surface (I did this on the bed), and begin to ‘bunch’ it up evenly. The aim is to gather it in your hands so the scarf is gathered up in one long “sausage” (not the best description, but I hope you get the idea). You can bunch up the fabric randomly, or pleat it carefully. With thicker fabric you can even fold the fabric back and forth in an acordian. With the fine fabric that I’m using, I simply bunch it up more randomly and it makes lovely soft stripes.
5. Decide where you will make your stripes. Will they be evenly distributed? How many will you make? I decided to make three stripes more-or-less evenly distributed.
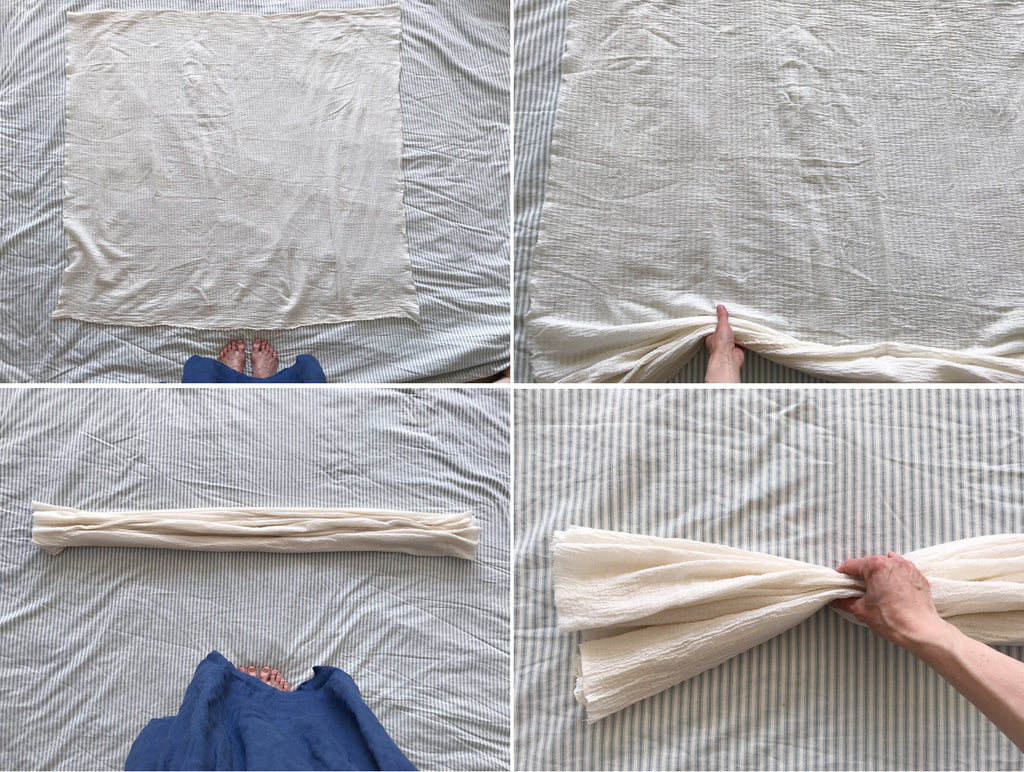
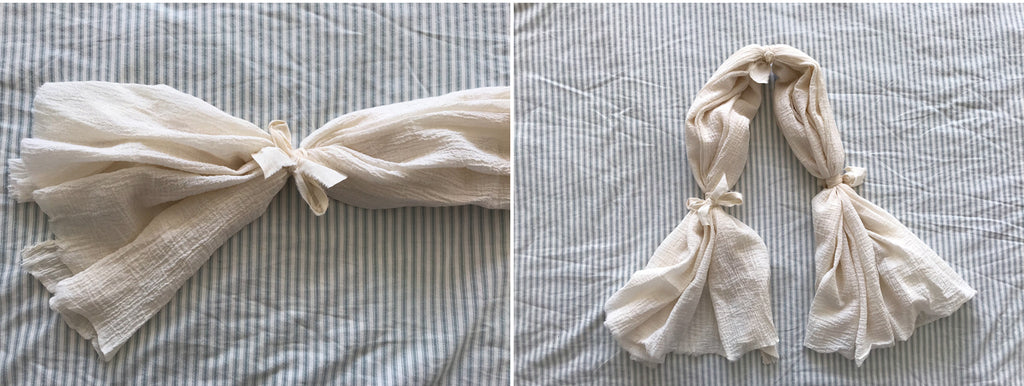
6. Begin wrapping a fabric strip around the bunched up fabric. I like to loosely wrap the fabric a couple of times, then pull it really tightly – as tight as I can manage. Then wrap it around 2-3 more times, and pull as tight as you can. The tighter you make the fabric strip, the bolder the stripe will end up. If you tie too loosely, the dye will permeate under the fabric strip and the stipe won’t show up very much. To secure the fabric, tie a single knot first, then tie a bow. You will need to undo the fabric tie when the fabric is wet, so make it a knot that you can undo fairly easily without scissors. It’s risky cutting the fabric tie later on, as there is a risk that you could accidentally cut the scarf at the same time (I’ve done this!). I prefer tying bows now that I can undo by pulling.
7. Tie as many fabric strips around the scarf as you’d like.
The “warm water” dyeing method
We’re going to dye our fabric with minimal heat. First we will heat the berries in water to extract the dye, then strain out the berries and soak the fabric in the water that has residual heat. This is not the usual method that I use for dyeing with plants, but I’ve found that mahonia berry dye can quickly lose its colour if it’s heated too long. (A bright pink dye pot can easily turn a dull shade of brown). Also, if it’s left sitting out over night, it can oxidise and lose the bright colour. So my preferred method is to simmer the berries to quickly extract the dye, then soak the scarf in the still-warm dye liquid. I keep an eye on the scarf during this time to monitor the shade.
Now let’s make our dye
- Weigh your fabric and use the twice the weight of berries as fabric. If you’d like a deeper shade, try using more berries. My scarf weighed 160g, so I used 320g of berries. You can use even more berries if you like.

- Pour the berries into your dye pot and cover with cold water. I added just a couple of inches of water – just enough for my scarf to soak in. We will be dyeing this scarf fairly quickly, so it’s best not to dilute the dye too much as the fabric won’t be in there long enough to dye to a deep enough shade.
- With the lid on, heat until the water simmers. I simmered my berries for about 15 minutes until they were soft. Turn the heat off and begin mashing the berries with a potato masher to release the colour.
- When you’ve mashed as many berries as possible to squeeze out the colour, take a bowl and strain the berries through a sieve lined with a muslin cloth. Now you’ll be left with a clear dye.
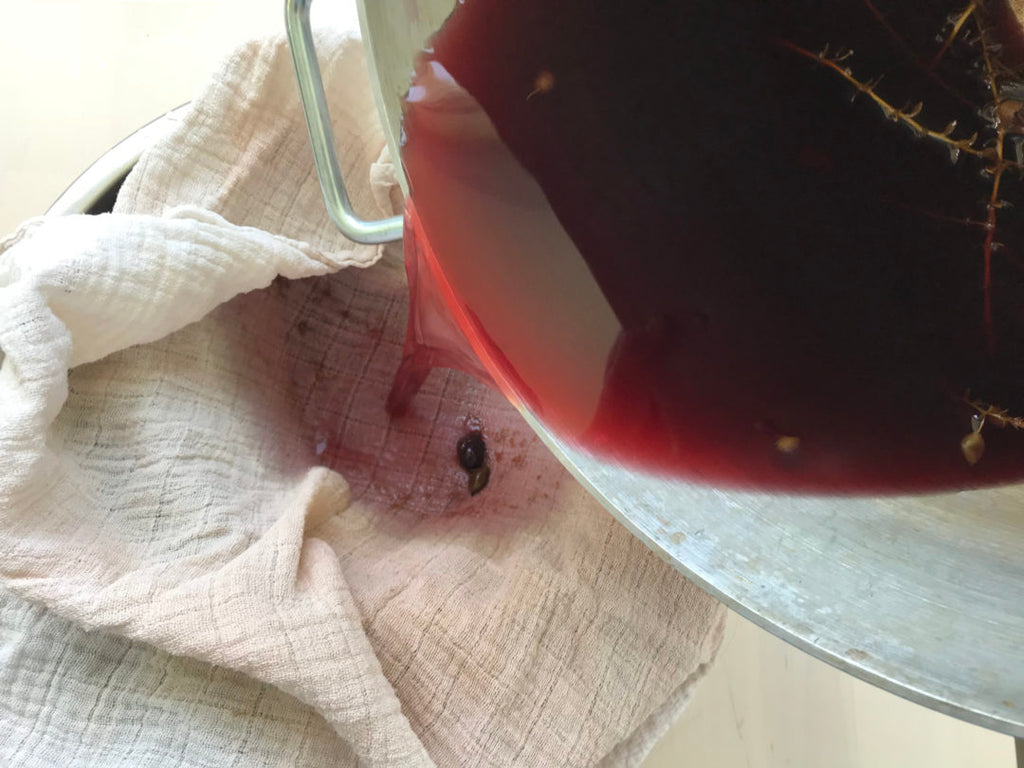
- Then wipe out the inside of the dye pot and pour the dye back in.
Dyeing our scarves
- To dye your scarf, dampen the cloth in tap water and squeeze it in your hands to remove the air as much as possible to avoid air bubbles. Then place it in the dye.
- Stir the fabric with a spoon and encourage the dye to get to all parts of the loose fabric. Wearing gloves, you can squeeze the fabric so the dye reaches all areas of the fabric. We want the dye to get into the folds around the fabric strips, so the pattern emerges.
- Leave it to soak in the liquid for a few hours and stir every so often. Keep an eye on the shade and don’t leave it in too long as the dye will begin to oxidise and turn brown. I left mine in for about 5 hours. You’ll see the liquid becoming paler, as the colour transfers into the fabric.
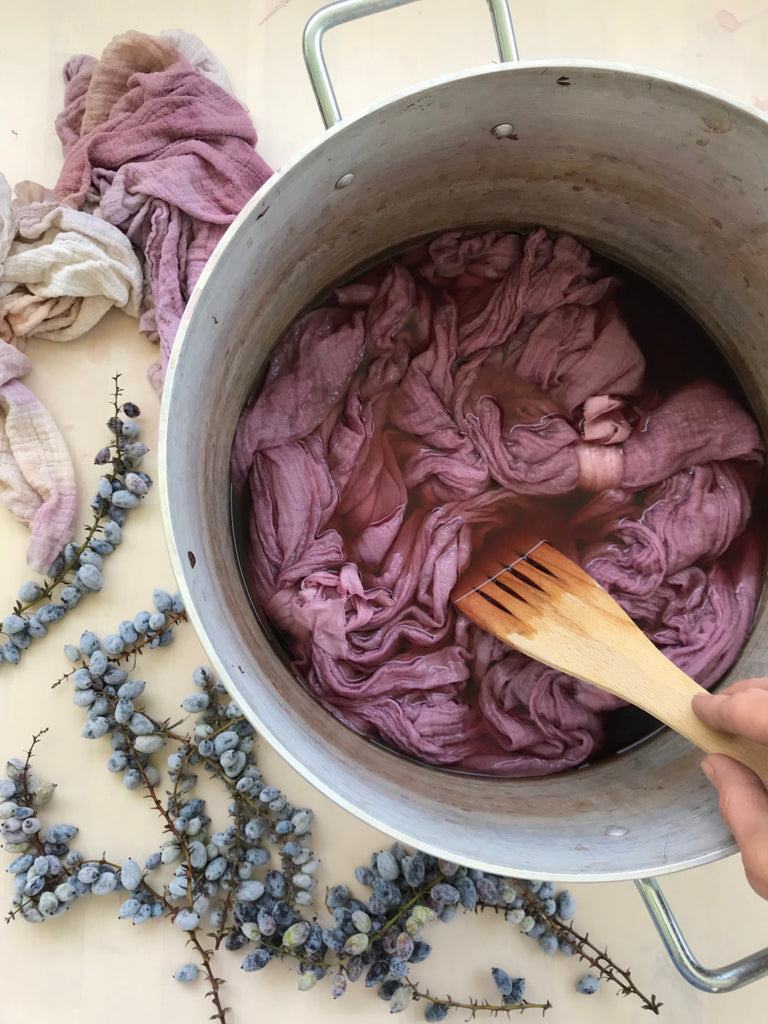
- When you you’re happy with the colour, take your fabric out of the dye and squeeze it to remove as much liquid as possible.
- Now we will rinse it. The dye is pH sensitive so your tap water is likely to alter the shade. The berries are naturally acidic and tap water tends to be pH neutral. I chose to add some vinegar to a pot of water and rinsed the scarf in the slightly acidic water to shift back to a purple shade. When I rinse in pH neutral tap water, the colour is a grey/teal. In a moment we’ll talk more about modifying the pH to control the resulting colour.
- Once you’ve rinsed the scarf, untie the fabric strips to reveal the undyed white stripes.
Play with the pH
Berries are pH sensitive which means their dyes will change colour depending on whether they come into contact with acids or alkalis. To clarify the vocabulary I’m using: in the UK we use the term alkali to refer to anything above pH 7. In the US, this is referred to as basic.
This is the range of colours I made from mahonia berries:
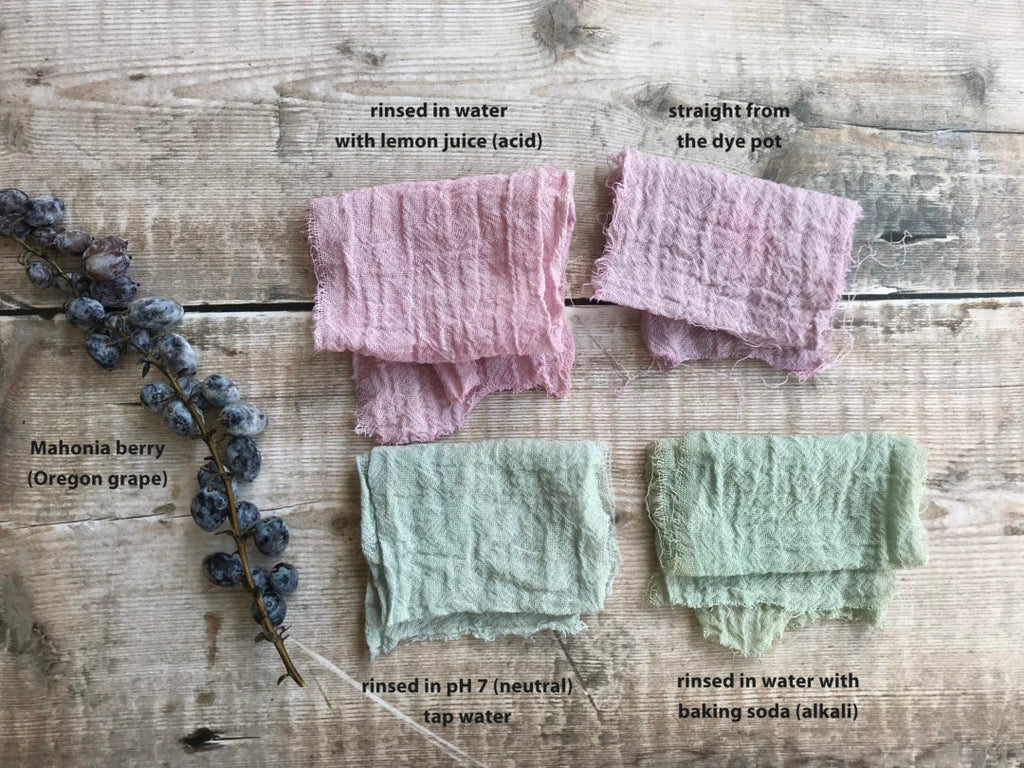
The pH of the water that you use to rinse the dyed fabric will affect the final colour of your fabric. To shift the colour, fill a bowl or dye pot with water and dissolve either a little baking soda (alkali) or add a squeeze of lemon juice or a dash of vinegar (acid). I used lemon juice for the small swatch and white vinegar for the scarf. After you’ve rinsed out the excess dye under the tap, return the fabric to the bowl of water and watch the colour change. Surprisingly, very little dye washed out of my scarf. I washed in a second pot of acidic water to be sure.
You can also paint the fabric with acidic or alkaline water to create multicoloured patterns!
In all honesty, the finished scarf has a very slight lingering smell of vinegar, so lemon juice might be a better choice (or any other citrus fruit you have). I didn’t want to waste fruit on my dye project, so decided to use vinegar as it’s so cheap. Whenever the scarf is washed, it will need to be rinsed through in a bucket of acidic water to shift the colour back to purple.
Berry-dyed clothing will be affected by the pH of our sweat (which is usually acidic), so bare this in mind if you dye clothing. The colour of clothing may shift back and forth each time it is washed, so have fun with the colour changing magic!
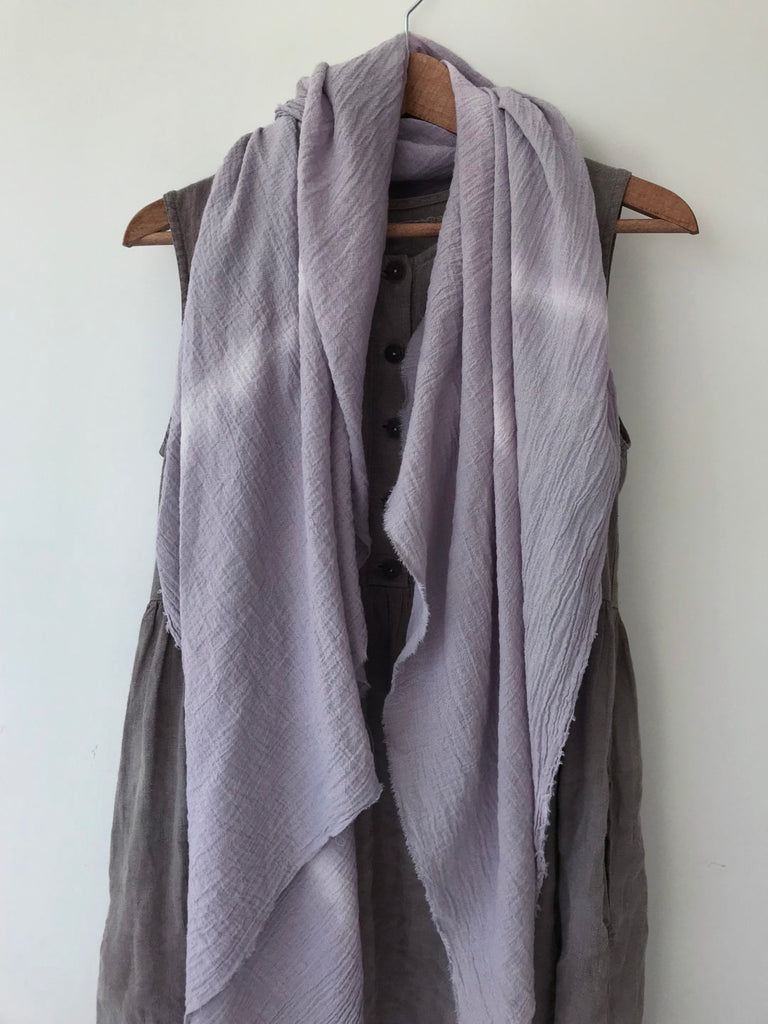
Enjoy your dyeing!
- You can find more botanical dyeing methods in my book Botanical Colour at your Fingertips.
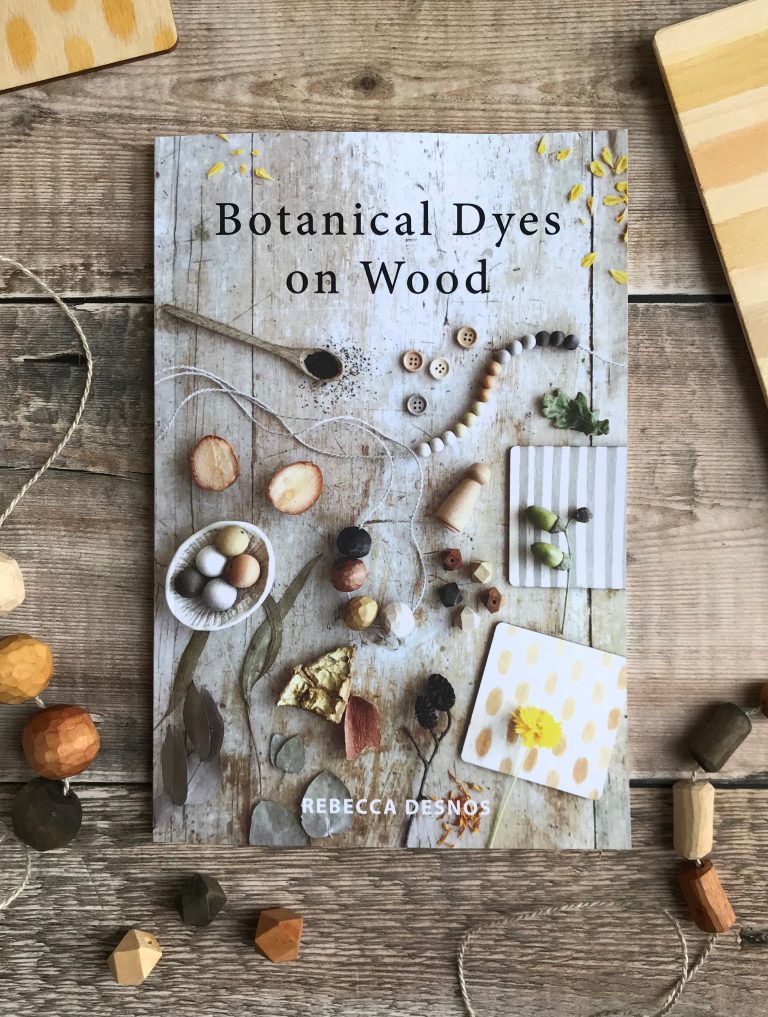
- For dyeing wood, grab a copy of my new eBook Botanical Dyes on Wood.
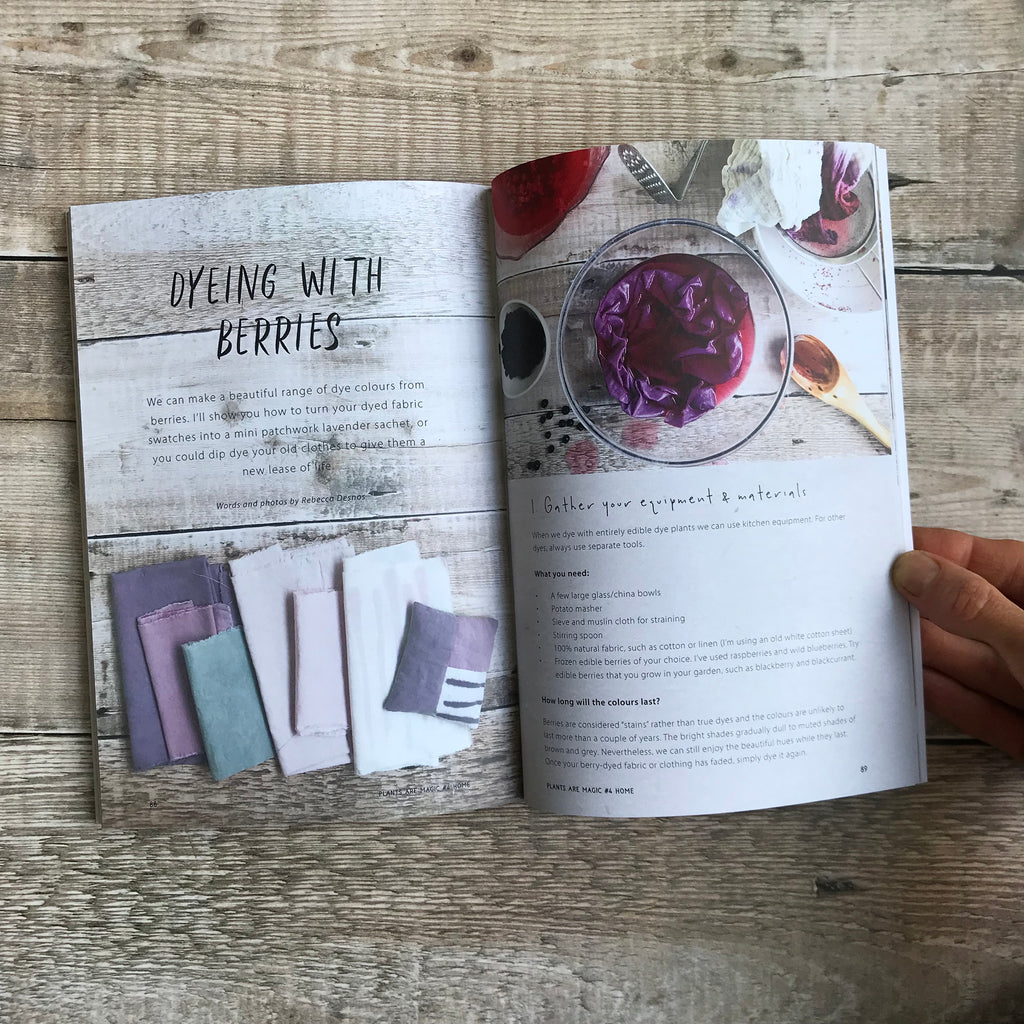
- If you’d like to try out a cold water dyeing method with berries, there’s a tutorial for this in volume 4 of Plants Are Magic magazine. Pop over to my shop to order it in print or download the eBook.
